LIMITED TIME ONLY
Get 50% off* select plans
Save big and let us handle covered home hassles.

Save big and let us handle covered home hassles.

Protect your home from freezing temperatures, drafts, and expensive repairs. Here’s everything you need to know about how to winterize your house inside and out.
Winter weather can be fierce—bringing cold air, ice, and storms that test every part of your home. The last thing you want is to deal with frozen pipes, heat loss, or unexpected repairs when temperatures drop, especially when you’d rather be staying cozy indoors. That’s where winterization comes in.
As residential energy costs continue to rise each year, preparing your home for the cold season is about more than comfort: it’s also about protection and savings.1 This guide walks you through how to winterize your house step by step, helping you keep your systems running smoothly, your energy bills under control, and your home ready for whatever winter brings.
The best time to start winterizing your house is early fall, before temperatures drop below freezing. Once nights start dipping into the 40s, it’s smart to inspect your heating system, clean gutters, and check windows and doors for drafts.
If you live in a colder region, begin the process in late September or early October. In milder climates, late October or November may be fine, but don’t wait until the first frost. Early action gives you time to fix small issues before they become big ones.
The goal of winterizing a house is to protect both your home’s exterior and interior from freezing temperatures, moisture buildup, and cold-weather wear and tear. By taking time to winterize home systems and surfaces now, you can help prevent big repairs down the line.
Follow this checklist to make sure your home is ready for winter inside and out.

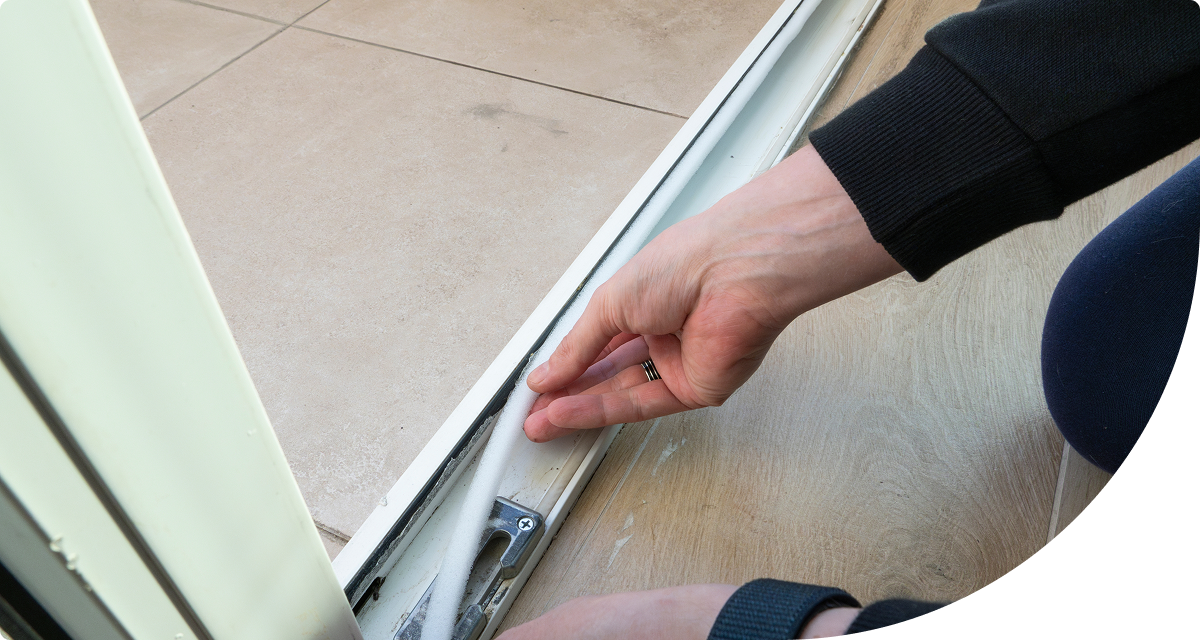
Start outside. Before freezing temperatures hit, check for weak spots where water or cold air can creep in.
To maintain your home’s exterior, make sure to:

Even if your home has gutter protection, dust and smaller bits of debris can get through the mesh and create gutter sludge. Scoop it out as part of your gutter cleaning process– and feel free to hold onto it to use as garden compost, if so inclined.


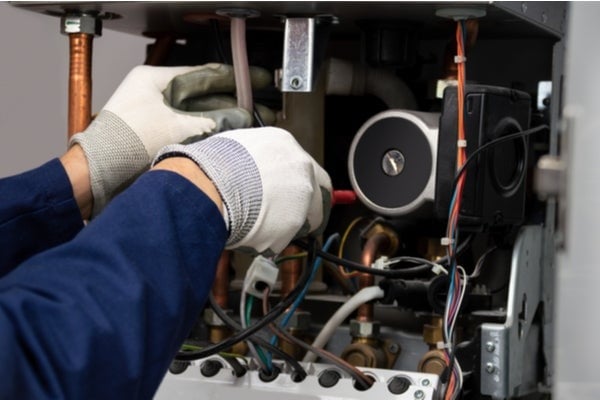
Once the exterior is secured, move inside for heating maintenance and HVAC maintenance, and take other precautions that make sure your home stays warm, efficient, and safe.
Here’s what to handle:
Don’t let winter catch you off guard.
Download our Winter Home Prep Checklist for a step-by-step guide to protecting your home inside and out this season.
Before you leave your home empty for the season, taking a few precautions can prevent major problems down the line. Simple steps like turning off the water supply, draining pipes, and setting your thermostat properly can help protect your home from freezing temperatures and costly repairs. Here’s how to winterize a vacant home before you go.
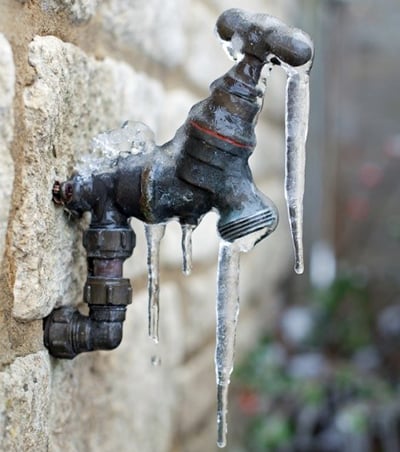
The most important thing you can do before winterizing your house is shut off the main water valve. Leaving water in the lines while the home sits unused increases the risk of frozen or burst pipes.
The shutoff is usually located outside, often in a utility box or near the foundation. If your home uses a well, flip the breaker to the pump instead. And if you’re unable to turn off the water supply completely for whatever reason, you can leave a small trickle running through faucets at opposite ends of the home to help prevent freezing.
Once the water is off, open every faucet and flush every toilet to drain remaining water. Let them run until only a slow drip remains. After toilet tanks have emptied, flush again to drain the bowls. If your home has a well, drain the pressure tank. If you plan to shut off the water heater, drain it too.
Wrap exposed pipes in unheated areas—like garages, basements, and crawl spaces—with foam or fiberglass insulation. This simple step helps keep pipes warm enough to prevent freezing. Seal gaps around pipe openings with caulk or spray foam, and consider using electrical heating tape on especially vulnerable sections.
Don’t turn your heating system off entirely. Keeping your thermostat (or smart thermostat) around 60 degrees helps protect both your pipes and your home’s interior systems. You’ll save on energy while maintaining a safe indoor temperature.
If you’re leaving the power on, unplug appliances such as TVs, microwaves, and coffee makers. This reduces the risk of electrical issues and saves a little energy while you’re away.
Before leaving, clear out trash cans and dispose of perishable food from the refrigerator. Nothing says “welcome home” like a fresh-smelling house—so don’t skip this final step.
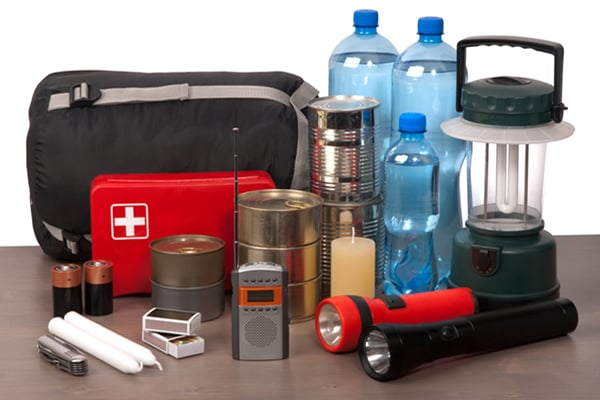
A vacant house can attract unwanted attention, especially during the winter months. Make your home appear occupied and secure before you leave.
With a few smart upgrades, you’ll have peace of mind knowing your home is both protected and prepared for the cold season.
Winterizing a house isn’t a one-time task—it’s part of maintaining a healthy, efficient home ready for the colder months. Keep an eye on your systems as temperatures drop: clear snow and ice from the roof when necessary, monitor for drafts or leaks, and stay on top of maintenance to stay ahead of changing weather.
If you’re managing on a tighter budget, programs like the U.S. Department of Energy’s Weather Assistance Program can help qualified homeowners winterize on a budget with free or reduced-cost energy improvements. And for more seasonal guidance, explore our resources on safe snow and ice removal, winter storm preparation, and cold-weather home safety.
When unexpected covered breakdowns happen, American Home Shield® can help you handle them with confidence. Our home warranty plans protect key home systems and appliances from covered breakdowns—so you can enjoy the season knowing your home is in good hands.
AHS assumes no responsibility, and specifically disclaims all liability, for your use of any and all information contained herein.
Sources:
1 https://www.eia.gov/todayinenergy/detail.php?id=64584
Pipes can start to freeze when outdoor temperatures drop to around 30°F or lower, especially if they’re exposed or uninsulated. Even at slightly higher temperatures, pipes along exterior walls or in unheated areas—like basements or crawl spaces—are at risk. Insulating vulnerable pipes and keeping your home heated to at least 55–60°F can help prevent freezing.
Most homeowners can complete basic winterization in a weekend, depending on the size of the home and its condition. Tasks like gutter cleaning, weather-stripping, and draining exterior pipes can be done in a few hours, while larger projects—like insulation updates or HVAC tune-ups—may take longer.
Yes, even in warmer regions, cold snaps can cause damage. A light freeze can still burst pipes or strain your heating system. Focus on insulating exposed pipes, checking window seals, and having your HVAC serviced to stay ready for sudden temperature drops.