Weatherstripping Your Doors and Windows
  1. Home Warranty
  2. Blog
  3. Quick Home Tips
  4. Weatherstripping Your Doors and Windows
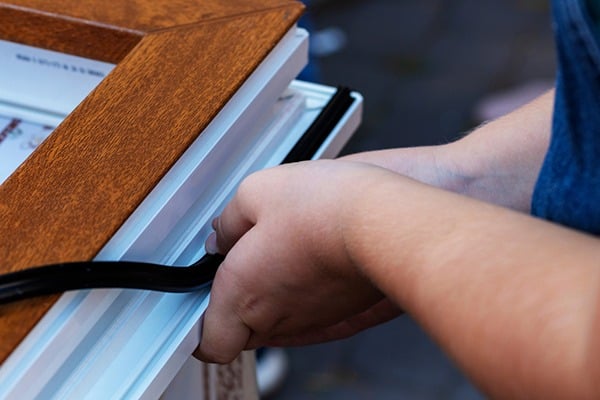
Weatherstripping a window frame

Weatherstripping Your Doors and Windows

Weatherstripping a window frame

While the heat is here now, and the cold is coming, you'll want to make sure your doors and windows are properly weatherstripped so that you don't lose cold air or heat. Here is a short guide on how to do the weatherstripping in your home.

When it gets cold outside, you rely on the weatherstripping for your windows and doors to keep your home warm, block drafts and keep your heating costs manageable. Even before cold weather arrives, weatherstripping lowers your cooling costs by keeping cold air in, so it’s important to make sure you have proper weatherstripping for your windows and doors.

How can you tell when it’s time to replace the weather seal around your doors and windows? How do you replace your door and window weatherstripping? Replacing the weatherstripping for your windows and doors is one of those DIY projects that’s easy for most homeowners to do. Here’s how.

Is It Time to Replace Your Weatherstripping?

Weatherstripping needs to be replaced every few years, so examine the stripping around your doors and windows yearly. It’s usually a good idea to do so in the early spring, after the weather has warmed, but before you need to turn on the A/C for the summer. 

Weatherstripping can be found around the inside of your door frame and inside your window frames. You can tell that your weatherstripping needs to be replaced if it looks warped, cracked, or otherwise deteriorated; if you can feel a draft around the edge of your window or door; or if you can see light around the edges of your door or window.

Measure Your Door and Window Frames 

Before you start your weather seal replacement, measure your door and window frames to determine how much weatherstripping you will need. In window frames, you will apply replacement weatherstripping to both the sides and bottom of the sash.

Choose New Weatherstripping

There are four kinds of weatherstripping: foam, tension seal, v-channel and felt. Felt is the cheapest but least effective, and it’s no good if it will be exposed to moisture. Foam tape is cheap and easy to install, and v-channel or v-strip is durable but more expensive. Tension seals are the most effective but can be the most difficult to install. Most homeowners choose foam weatherstripping for doors and v-channel weatherstripping for windows, or a combination of the two, because they’re the easiest to install and the most cost effective.

If you’re weatherstripping a door, you can choose a single type of weatherstripping, but if you’re weatherstripping your windows, you should combine v-channel weatherstripping with foam weatherstripping. Use foam weatherstripping for the bottom and top of the window sash, and v-channel weatherstripping in the sides of the sash.
Thinking about coverage?

Security for your home. Protection for your budget.

Remove Old Weatherstripping and Debris

Before you can apply new weatherstripping, you’ll need to remove the old. If the old weatherstripping was held on with adhesive, you can simply pull it off, but if it was stapled or nailed in, remove the old nails or staples, and if you want, fill in the holes. Clean off any adhesive residue and other dirt or debris on the surface.

Measure and Cut the New Weatherstripping

Measure and cut new strips of weatherstripping to apply to your door or window frame. Cut your lengths of weatherstripping about an inch longer than necessary; you can trim them to fit the frame when you are done. Cut one piece for each side of the frame. For windows, cut one piece of v-channel weather stripping for each channel on the jamb, and two foam pieces — one for the top and one for the bottom. Apply another strip of v-channel weatherstripping to the back of the top of the bottom sash. Make sure the v-channel opens upward, so that the seal is tight when the window is closed.

Apply the Weatherstripping

Foam tape weatherstripping for windows and doors is self-adhesive and easy to apply. Start slowly; peel off a little bit of the adhesive and apply the weatherstripping a little at a time. If you have problems getting it to stick, apply some superglue to the back of the foam.

V-channel weatherstripping has adhesive, but you should also use finishing nails to hold it in place. Once you’ve nailed the weatherstripping in place, test the sash to make sure it’s not catching on the seal.

Test the New Seal

After you’ve applied new weatherstripping around your doors and windows, it’s time to test the seal. You can test it by closing a dollar bill in the door or window and trying to pull it out. 

If it doesn’t come easily, you’ve sealed the door or window well.

Weatherstripping keeps leaks and drafts out of your home, so you can enjoy lower energy costs and a more comfortable house. It’s easy to replace the weatherstripping around your doors and windows, and now is the perfect time of year to do it. When the cold winter winds blow, you’ll be nice and cozy in your draft-free home.

Share:

Was this article helpful?

AHS assumes no responsibility, and specifically disclaims all liability, for your use of any and all information contained herein.

American home shield short logo mark

Don't worry. Be warranty.

Have a plan for your home when things don't go according to plan

Shop Home Warranties